3D
3D layers, cameras and lights
Any picture, video, text, shape, solid or pre-comp layer can become a flat card in 3D space, seen through cameras and lit by lights that cast shadows. Boxes, spheres, cylinders, imported models and extruded text and shapes share the same space, so everything hides and shadows everything else as it should.
Make a layer 3D
A 3D layer gets depth: it can move towards or away from the camera, turn on all three axes, and take light and shadow. Camera, light, 3D primitive and model layers are always 3D. To make another layer 3D, use any of these:
- The Timeline: select Show Layer Switches columns at the foot of the layer list, then the cube in the layer’s 3D layer column (see Layer switches (opens in a new tab)).
- The layer’s right-click menu: Switches → 3D layer.
- Properties: the 3D layer switch under Layer Settings.
Its Transform then holds 3D Anchor Point, 3D Position and 3D Scale, each with a Z value, and four ways to turn it: Orientation sets which way it faces, and X Rotation, Y Rotation and Z Rotation turn it about each axis, so you can animate the turn on one axis without the others. In the Viewer, a 3D layer shows arrows to drag it along an axis; 3D axis space in the toolbar sets whether those axes are the composition’s (World), the layer’s own (Local) or the view’s (View).
A pre-comp layer with Collapse Transformations on lets its own 3D layers join the composition it sits in, with that composition’s cameras and lights.
Cameras
Add a camera with New layer → Camera. The composition is seen through the topmost camera layer that is visible at the current time; with none, you see it straight on, as a 2D composition is seen. Its Camera Options are:
- Camera Type: a Two-Node Camera always looks at its Point of Interest, which you place and animate in its Transform, so it keeps a subject in frame as it moves; a One-Node Camera looks wherever its orientation points, like a camera on a shoulder.
- Zoom is the distance from the lens to the picture plane, in pixels: the larger, the narrower the view. Projection is Perspective, or Orthographic for a view without perspective.
- Depth of Field blurs what is nearer or farther than Focus Distance, the more so the wider the Aperture and the higher the Blur Level, as a real lens does (depth of field (external website, opens in a new tab)).
- Near and Far are the closest and farthest the camera sees.
To frame the shot by dragging in the Viewer, use the camera tools in the toolbar: the Orbit Camera tool (1) circles the camera round what it looks at, the Pan Camera tool (2) slides it sideways and up and down, and the Dolly Camera tool (3) moves it closer or farther. They change the active camera’s Position (and its orientation or point of interest) at the current time, as steps you can undo; they work on a camera that has no parent.
Lights and shadows
Add a light with New layer → Light. While a composition has no lights, its 3D layers show as they are; once it has one, they are lit by it, pixel by pixel. Light Type is one of:
- Parallel — light from one direction, from infinitely far away, like the sun.
- Point — light in every direction from one place, like a bare bulb.
- Spot — a cone of light, as wide as Cone Angle, with an edge softened by Cone Feather.
- Ambient — light from everywhere at once, with no direction and no shadows, to lift the dark sides.
- Environment — light from an HDR picture all round the scene, described below.
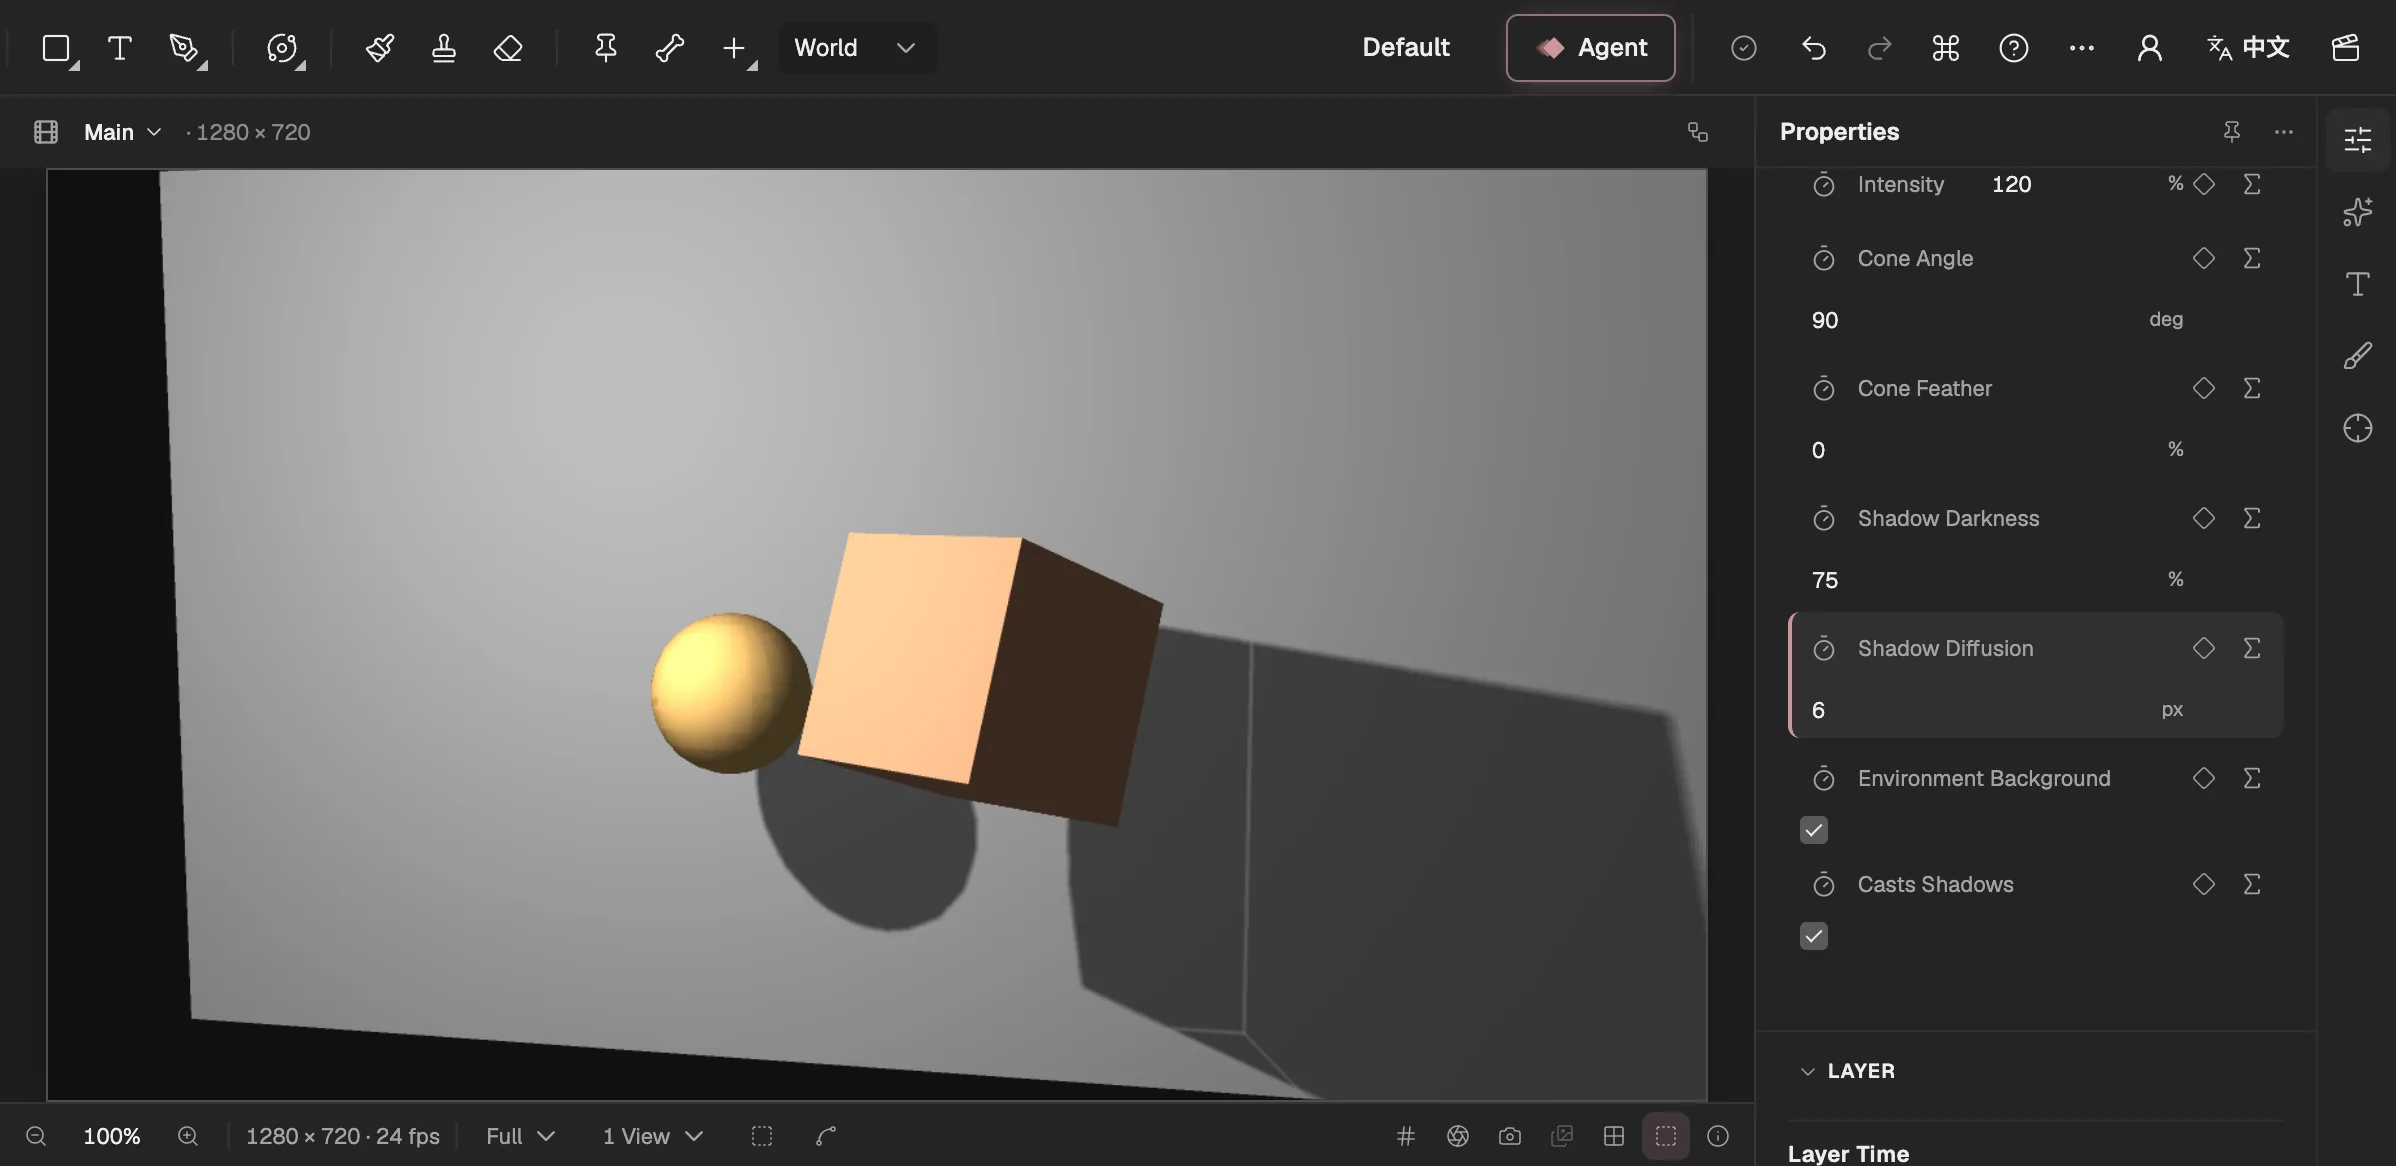
- The camera tools: orbit, pan and dolly.
- How bright the light is.
- A spot light’s cone.
- How dark and how soft the shadows are.
- Whether the light casts shadows.
Light Color and Intensity set its colour and brightness. Falloff makes a point or spot light dim with distance, starting at Radius and over Falloff Distance.
Shadows take two switches: the light’s Casts Shadows (on for a new light) and the Casts Shadows of each layer that should throw a shadow (off for a new layer), under its Material Options. Shadow Darkness sets how much light a shadow keeps out, and Shadow Diffusion how soft its edge is.
Material Options
Every 3D layer that can be seen, primitives and models included, has Material Options, which say how it takes the light:
- Casts Shadows, Accepts Shadows and Accepts Lights — whether it throws shadows, shows shadows falling on it, and is lit at all.
- Ambient and Diffuse — how much ambient light and how much direct light its surface gives back.
- Specular and Shininess — how strong the highlight is and how small and sharp.
- Reflection and Reflection Sharpness — how much it mirrors the environment light’s picture, and how clearly.
Primitives and models
A 3D Primitive, from New layer, is a solid shape: a Box, a Sphere or a Cylinder. Set its Dimensions and Material Color; for a sphere or cylinder, Radial Segments and Height Segments set how smooth its curve is.
A 3D Model comes from importing a glTF (external website, opens in a new tab) (.glb or .gltf) or OBJ file, as described in Importing (opens in a new tab). A glTF model keeps its colours, textures and how metallic and rough its surfaces are. If the file holds animations, Animation picks which one plays, in step with the layer’s time; 0 holds the model at rest.
Environment light
Import a Radiance HDR picture (.hdr) and it becomes a Light layer of the type Environment: the picture surrounds the scene and lights it from every direction, the way a sky does, and shows in shiny surfaces through their Reflection. Turn the layer to turn the picture round the scene. Environment Background also shows the picture behind everything; Intensity and Light Color tint and brighten it.
An environment light needs its picture: choosing Environment for a light made with New layer gives no light. Environment and ambient lights cast no shadows.
Extruded text and shapes
Text and shape layers can be given real depth, with walls and bevelled edges, under Geometry Options. No special renderer is needed.
Make the layer 3D, as above.
Set Extrusion Depth, how deep the letters or the shape go, in pixels.
Choose a Bevel Style, Angular, Concave or Convex, and its Bevel Depth, up to half the extrusion’s depth.
Colour the sides. The walls and bevels take the colour of the outline they grow from; tick Custom Side Colors to give them a Side Color and a Bevel Color of their own.
Two and four views
To see a 3D scene from more than one side while you arrange it, choose 2 Views or 4 Views under Views in the bar under the Viewer. The first view is the Viewer as ever, through the active camera, where you select and edit; each other view has a menu to show Active Camera, Front, Left, Top or a custom view such as Custom View 1.
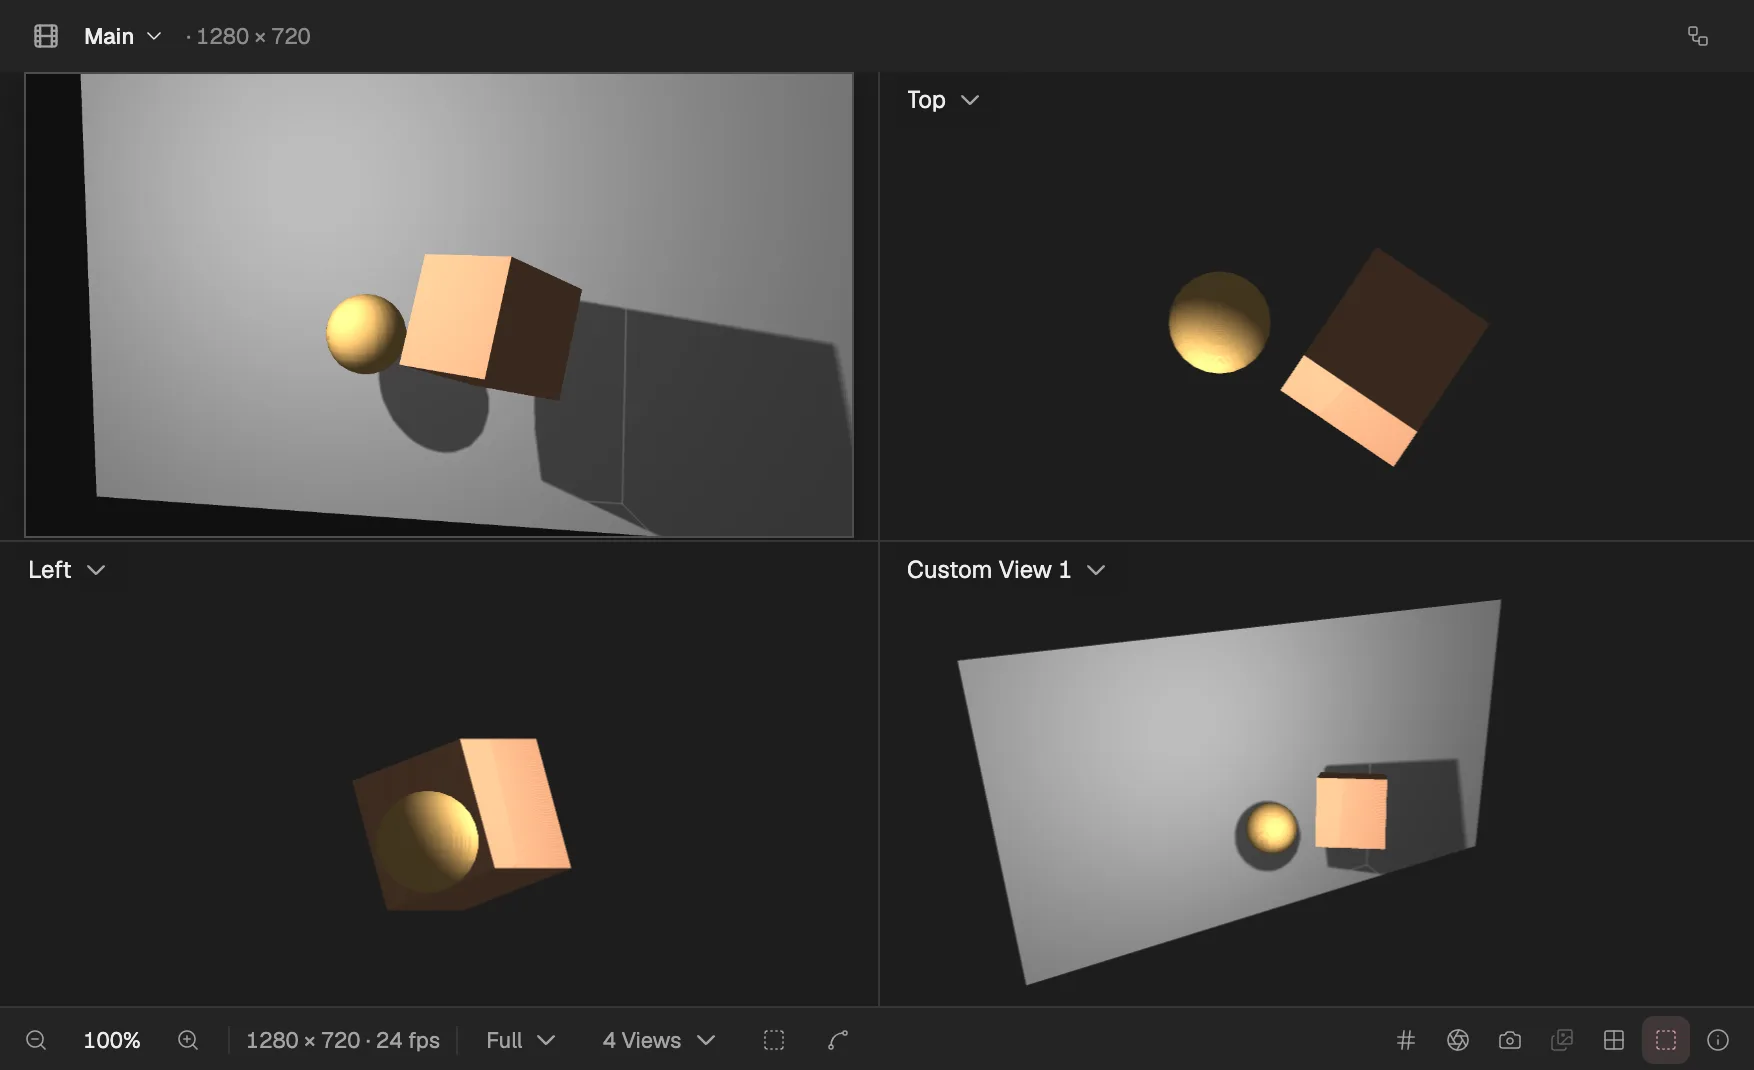
- One, two or four views.
- The Viewer, through the active camera.
- What this view shows.
- A custom view, which you can turn by dragging.
In a custom view, drag to orbit round the scene, Shift-drag to pan and Alt-drag or scroll to move in and out; the arrow keys, Shift and arrows, and Page Up and Page Down do the same. Front, Left and Top are drawn without perspective, and without the camera’s depth of field. Views belong to this browser, not to the project, and never change your animation.
Good to know
- Layers, primitives, models and extruded geometry are drawn into one depth buffer by your graphics card, so they pass through and in front of one another correctly, whatever their order in the Timeline.
- Shadows are drawn from shadow maps, 16 tiles of them at most: a point light takes six, a spot or parallel light one. Lights past that cast no shadows.
- A layer whose Quality is Draft is drawn unlit, to keep the Viewer quick.
- Not there yet, compared with After Effects: the Cinema 4D renderer, ray tracing and global illumination, volumetric light, editing a model, and importing FBX or USD files.