Animation
Motion blur and frame blending
Motion blur (external website, opens in a new tab) smears a moving layer along its path, the way a camera does when something moves while its shutter is open. Frame blending smooths footage that plays at a different speed or frame rate from the composition.
Turn on motion blur
Motion blur has two switches, as in After Effects: one on each layer, and one for the whole composition. A layer blurs only when both are on.
Show the switches. Select Show Layer Switches columns at the foot of the Timeline, or press F4 there.
Switch on the layer. Select the layer’s Motion Blur switch. The same switch is under Layer Settings in Properties.
Switch on the composition. Select Composition Motion Blur in the Timeline toolbar. The viewer now blurs every layer whose switch is on.
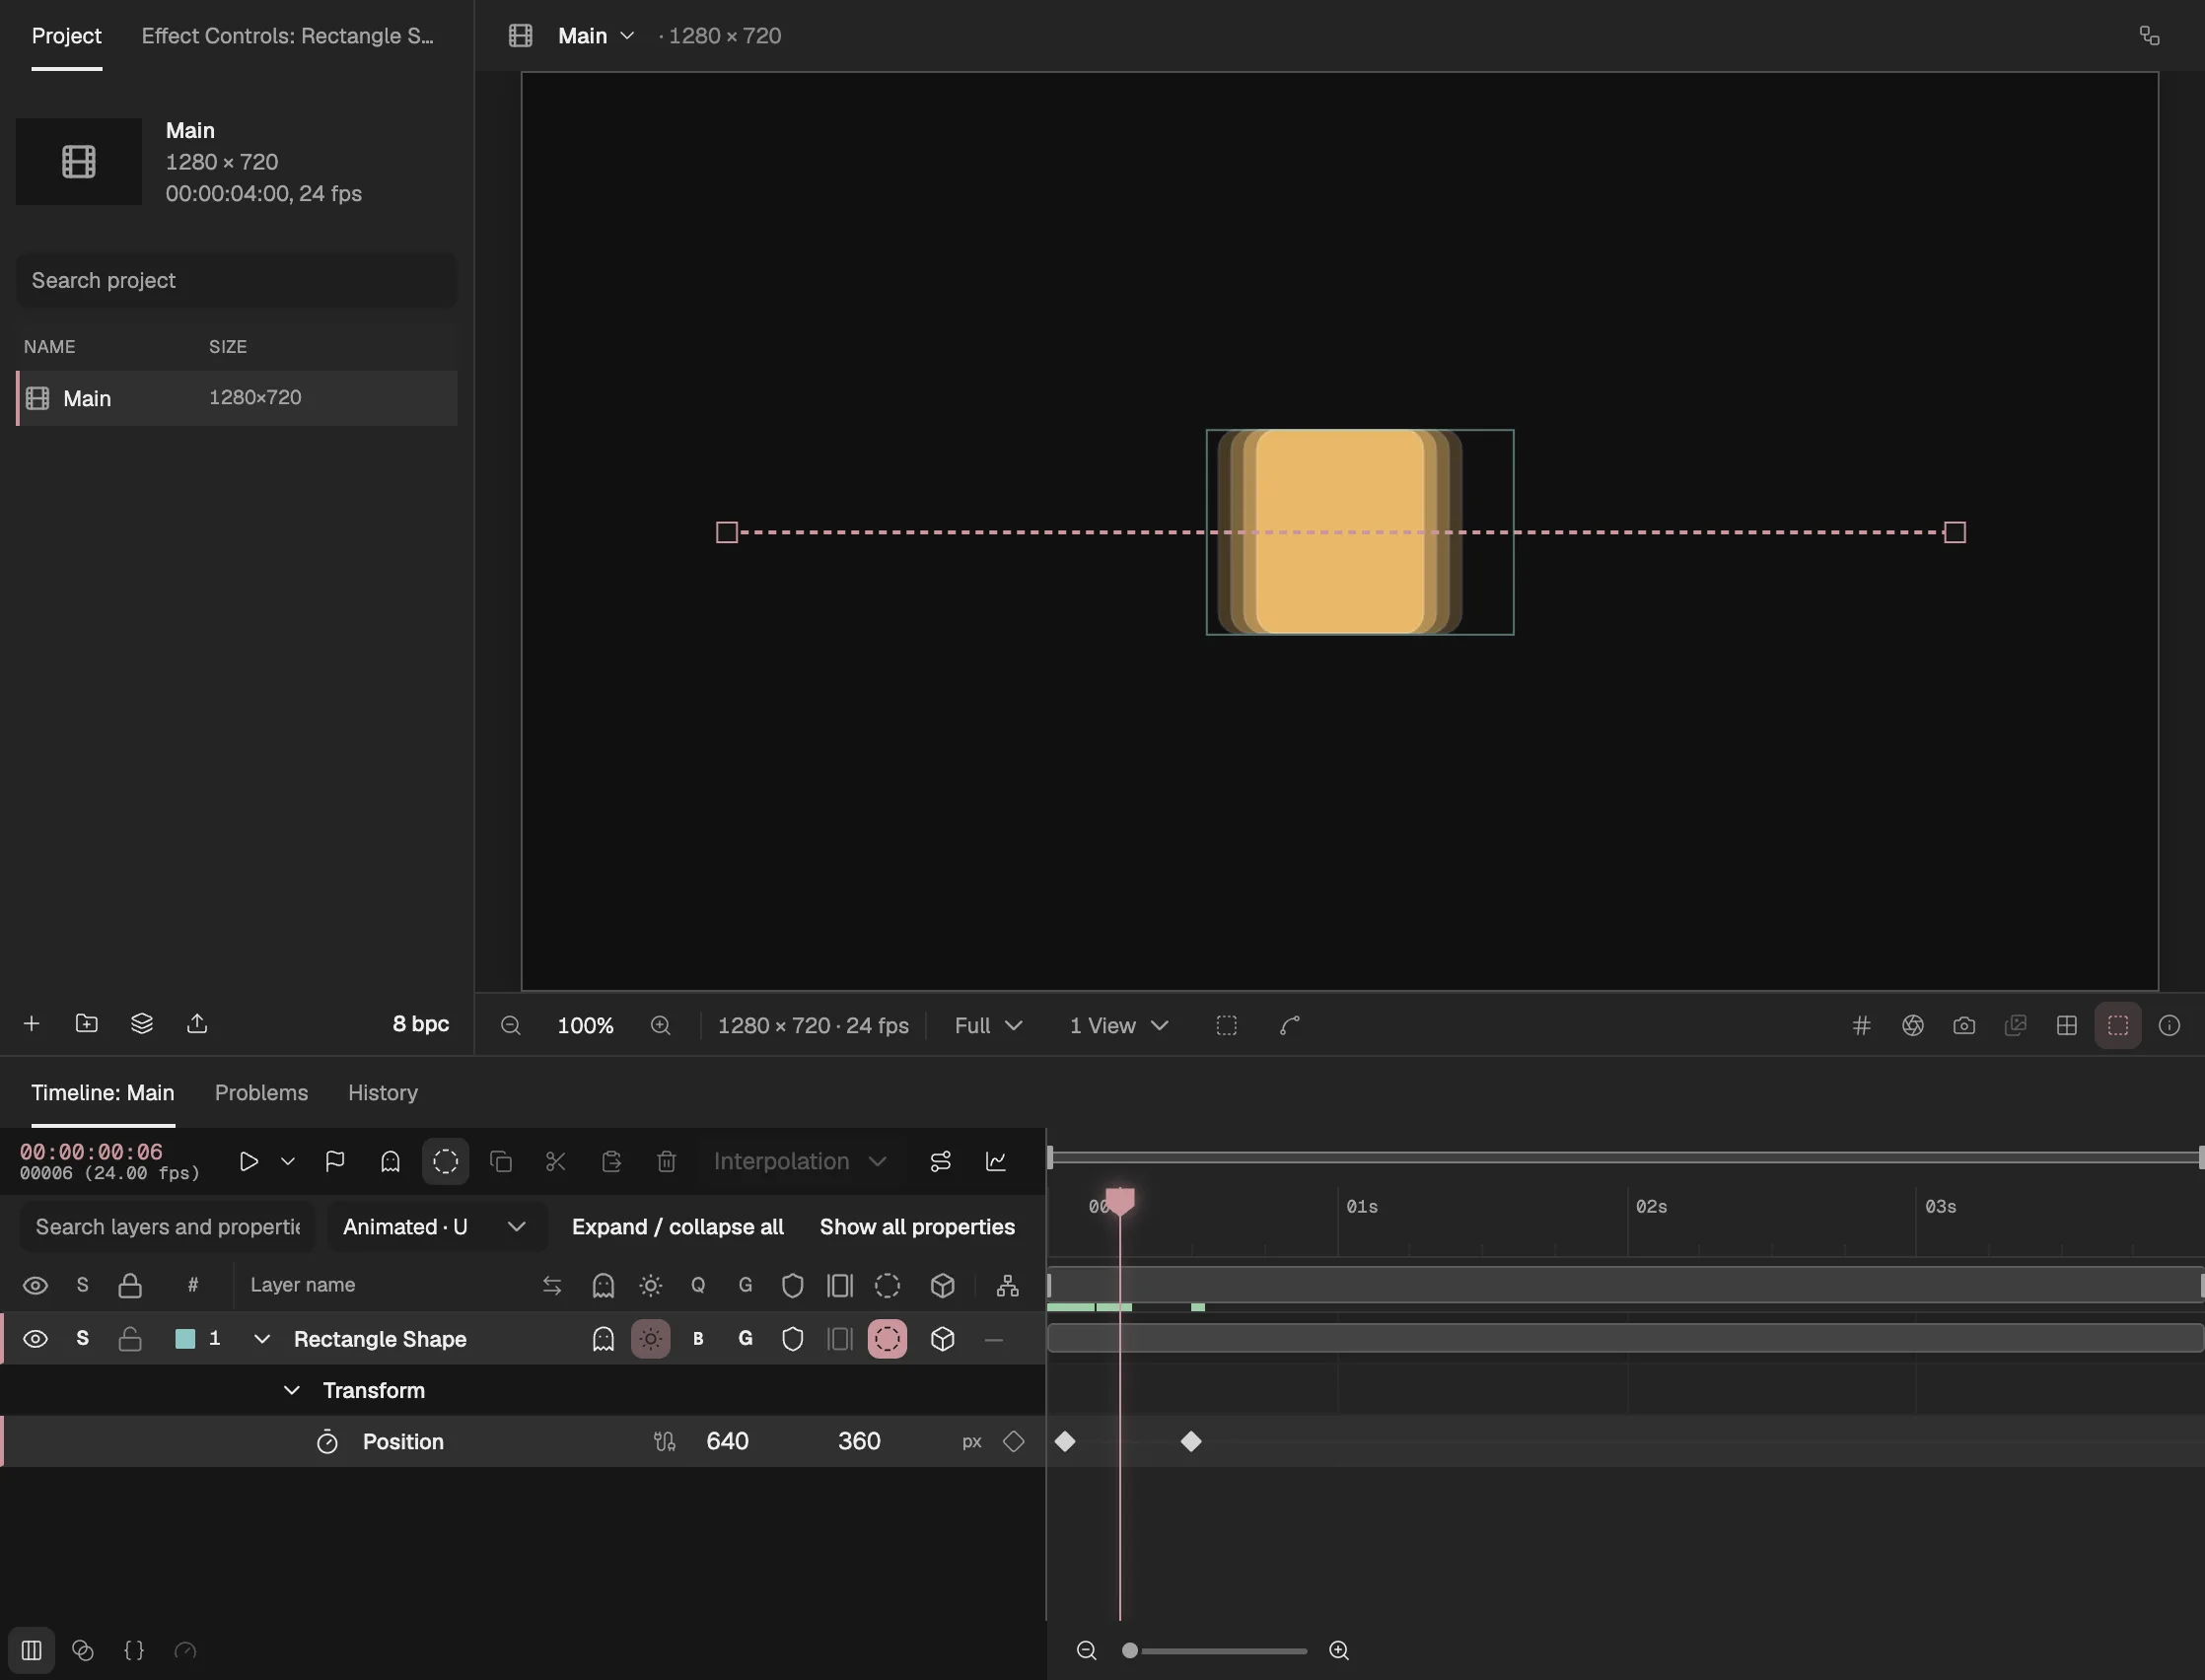
- A fast-moving layer, blurred along its path.
- The composition’s motion blur switch.
- The layer’s motion blur switch.
- Shows the switch columns.
Only change between frames blurs: a layer moving, turning or scaling, or anything else on it that is animated. A layer that stands still stays sharp.
Shutter angle and phase
How long the blur is depends on the composition’s shutter. Double-click the composition in the Project panel to open Composition settings, then open Advanced.
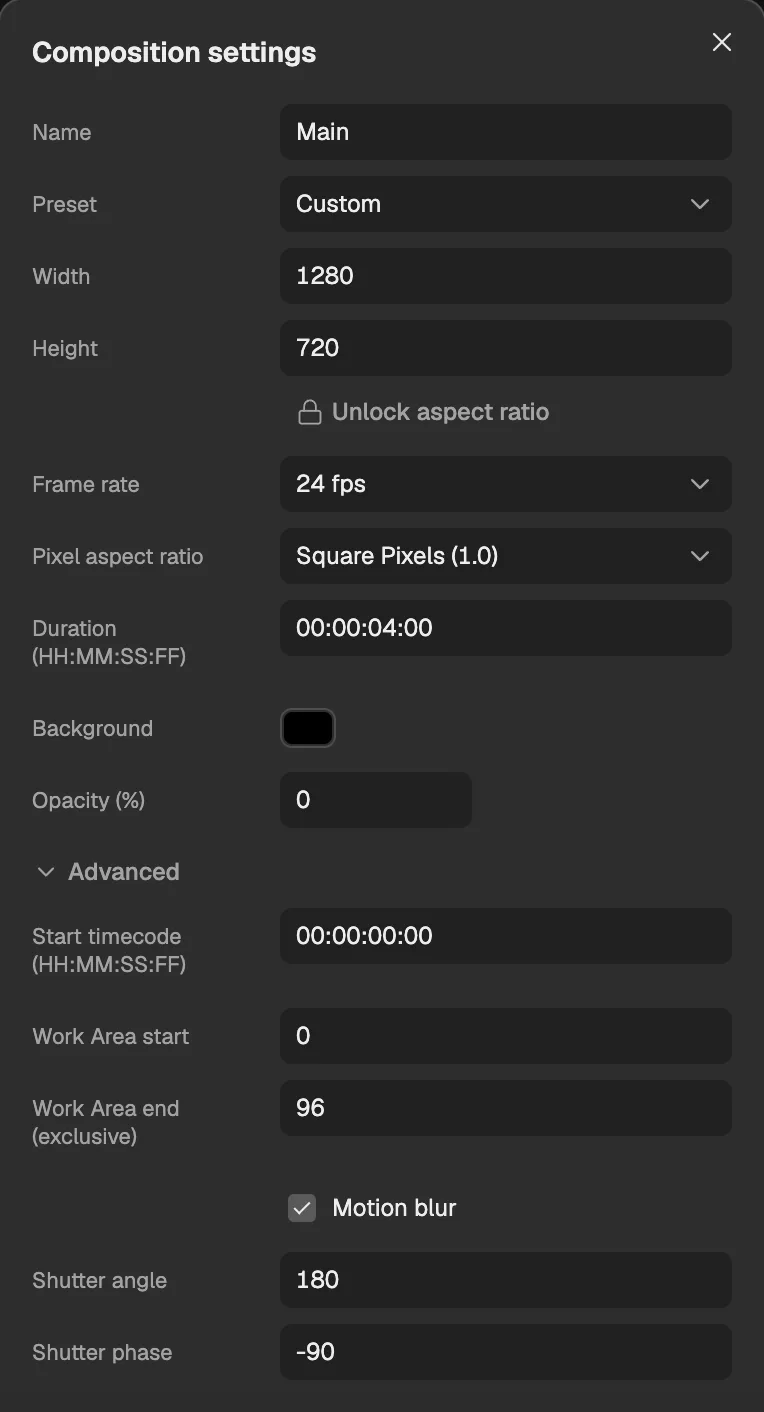
- The composition’s motion blur switch, the same as the button in the Timeline.
- How long the shutter is open in each frame.
- When the shutter opens, relative to the frame.
Shutter angle is how long the shutter stays open in each frame, in degrees: 360° is the whole frame, and the default, 180°, half of it. A larger angle blurs more; it goes from 0° to 720°.
Shutter phase is when the shutter opens, relative to the frame, from -360° to 360°. The default, -90°, opens it early enough that, with the default angle, the blur is centred on the frame.
The viewer draws motion blur from 4 moments within each frame, to stay quick; exports use 12, so the exported blur is smoother than the preview.
Frame blending
Footage has its own frame rate. When it plays slower than the composition, because it was shot at a lower rate or has been slowed down, the same picture shows for several frames and the motion stutters. Frame blending makes in-between pictures instead.
- Frame Mix fades from one frame of the footage into the next. It works on video and pre-composition layers.
- Pixel Motion works out how each pixel moves between the two frames and draws it part of the way. It looks smoother and takes longer, and works on video layers of up to 2,073,600 pixels.
Choose it under Frame blending in the layer’s Layer Settings, or with the layer’s Frame Blending switch in the Timeline, which steps through Frame Mix, Pixel Motion (video only) and Off.