Layers and properties
Blend modes and layer styles
A layer’s blend mode decides how its colours mix with the layers below it. Layer styles add shadows, glows, bevels, overlays and strokes drawn from the layer’s own shape.
Blend modes
Select the layer.
Choose a Blend mode in Properties under Layer Settings, in the Blend mode column of the Timeline (Show Modes columns, or F4), or from the layer’s right-click menu.
Look at the Viewer. The mode mixes the layer with everything below it, from the next layer down to the composition’s background.
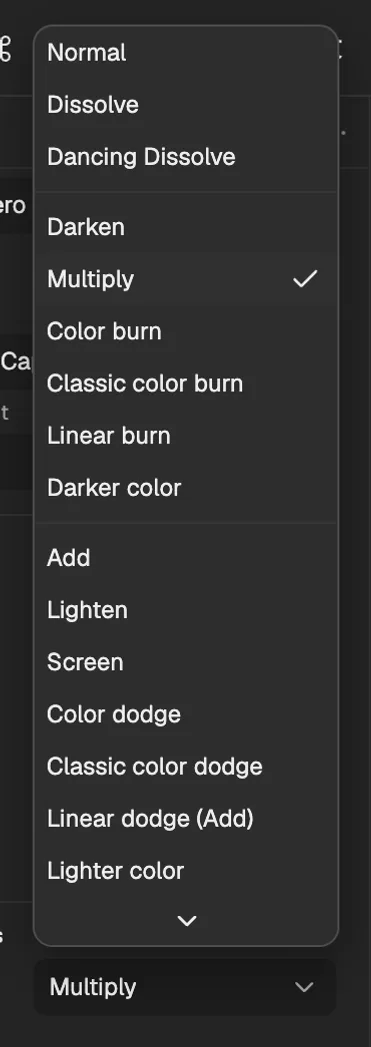
- The layer’s mode.
- Each group starts after a line: these darken.
- These lighten.
Normal simply covers what is below. The others are the blend modes (external website, opens in a new tab) of image editors and After Effects.
Every blend mode
| Group | Modes | What they do |
|---|---|---|
| Normal | Normal, Dissolve, and Dancing Dissolve | Cover what is below; the dissolves show a random share of pixels, by opacity. |
| Darken | Darken, Multiply, Color burn, Classic color burn, Linear burn, and Darker color | Keep the darker colours; white has no effect. |
| Lighten | Add, Lighten, Screen, Color dodge, Classic color dodge, Linear dodge (Add), and Lighter color | Keep the lighter colours; black has no effect. |
| Contrast | Overlay, Soft light, Hard light, Linear light, Vivid light, Pin light, and Hard mix | Darken the dark and lighten the light, for more contrast; 50% grey has no effect. |
| Difference | Difference, Classic difference, Exclusion, Subtract, and Divide | Subtract or divide one colour by the other. |
| Colour | Hue, Saturation, Color, and Luminosity | Take the hue, saturation, colour or brightness of the layer, and the rest from below. |
| Stencil and silhouette | Stencil Alpha, Stencil Luma, Silhouette Alpha, and Silhouette Luma | Use the layer’s alpha or brightness to cut out, or into, everything below. |
| Utility | Alpha Add and Luminescent premul | Join two pieces of a picture along a soft edge without a seam, or add a glow that keeps its brightness where it is transparent. |
- A 3D layer does not offer Dissolve or Dancing Dissolve, and a 3D primitive layer always blends as Normal.
- The Classic modes keep After Effects’ older formula for partly transparent layers. Over an opaque background they look the same as the modes they are named after.
Preserve Transparency and track mattes
Preserve Transparency, under Layer Settings, shows a layer only where the layers beneath it already have something: paint a texture over a shape without spilling past it. It does not change the layers below, and it cannot be combined with Collapse Transformations.
A layer can also take its transparency from another layer, its track matte, chosen under Relationships → Track matte in Properties or in the Track matte column of the Timeline. Mattes are covered in the Masks and keying chapter.
Layer styles
There are 9 layer styles, each described in the effect reference:
- Drop Shadow (opens in a new tab)
- Inner Shadow (opens in a new tab)
- Outer Glow (opens in a new tab)
- Inner Glow (opens in a new tab)
- Bevel and Emboss (opens in a new tab)
- Satin (opens in a new tab)
- Color Overlay (opens in a new tab)
- Gradient Overlay (opens in a new tab)
- Stroke (opens in a new tab)
Right-click the layer in the Timeline or the Viewer, point to Layer Styles and choose a style. They are also under Layer Styles in Effects & Presets.
Set it in Effect Controls, where the style is listed with the layer’s effects. Its settings can be keyframed like any property.
Add more styles the same way.
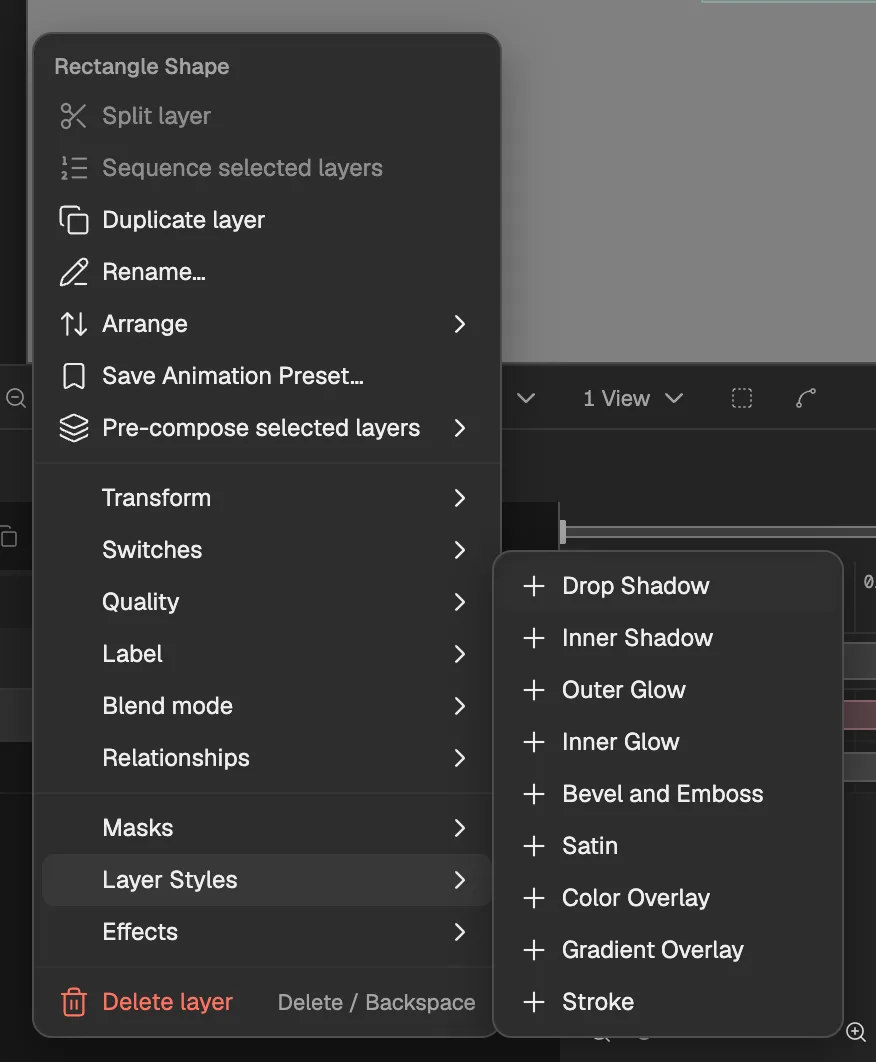
- The layer’s blend mode, from the same menu.
- The layer styles.
- Adds the style to the layer.
- Styles are drawn after the layer’s other effects, from its alpha, and always stack in the same order, Drop Shadow lowest and Bevel and Emboss highest, whatever their order in the list.
- Styles work on Image, Video, Text, Shape, Solid, Composition, and Adjustment layers.
- The Effects checkbox at the top of Effect Controls turns all of a layer’s effects and styles off at once.