Render and export
Render queue and output modules
The Render Queue in the Export dialog keeps exports to render later, one after another, so you can set up several and let them run. The Output Module holds a file’s finer settings, and keeps them as templates for next time.
Queue several exports
Set up an export in Export, as for a single export (opens in a new tab).
Select Add to Render Queue instead of Export now. The export joins the Render Queue as Held. Change the settings and add the next one.
Start them. Select Start rendering this item, the play button, on each item you want rendered. Items render one at a time from the top of the list down, and your browser downloads each file when it is ready.
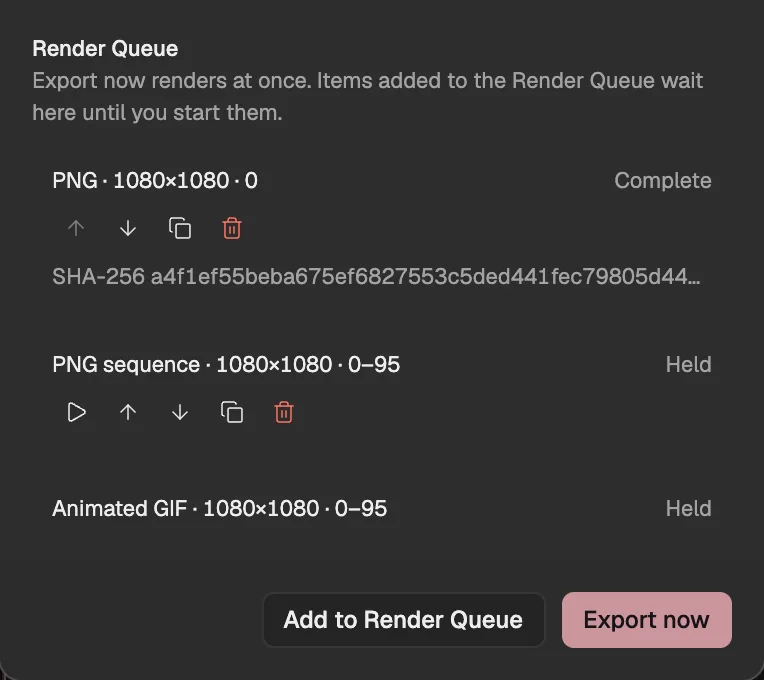
- A finished item.
- An item waiting for you to start it.
- Starts the item.
- Moves the item up or down the queue.
- Adds the export to the queue without rendering it.
- Renders the export now and downloads the file.
- Pause this item holds an item that is waiting, or stops one that is rendering; started again, it renders from its first frame.
- Duplicate this item adds a held copy at the end of the queue, and Remove from the Render Queue takes an item off the list. Cancel export, at the foot of the dialog, stops the item that is rendering.
- The queue is kept with the project in this browser. An item renders the project as it was when you added it: if you change the project afterwards, the item says so, and Update to the current project brings it up to date before you start it.
Output Module
Open Output Module in the Export dialog for the settings beyond format, size and background:
- Frame rate (fps): renders at a different frame rate from the composition’s. Left empty, the file keeps the composition’s.
- Image quality %: for formats that save space by losing detail, such as JPEG.
- Crop (composition pixels): trims each side by a number of the composition’s pixels.
- File name: the downloaded file’s name, built from the tokens listed under the field, such as [compName] and [width].
- Lock aspect ratio when resizing: keeps the width and height in proportion when you change one of them.
Output Module templates
Save. Set the format, size, background and Output Module, type a name in Template name at the top of Output Module, and select Save template.
Use. Choose the template under Output Module template. Its settings fill the dialog; the frames to render are set afresh for the composition you are exporting.
Delete. Choose the template, then Delete template, the bin beside it.
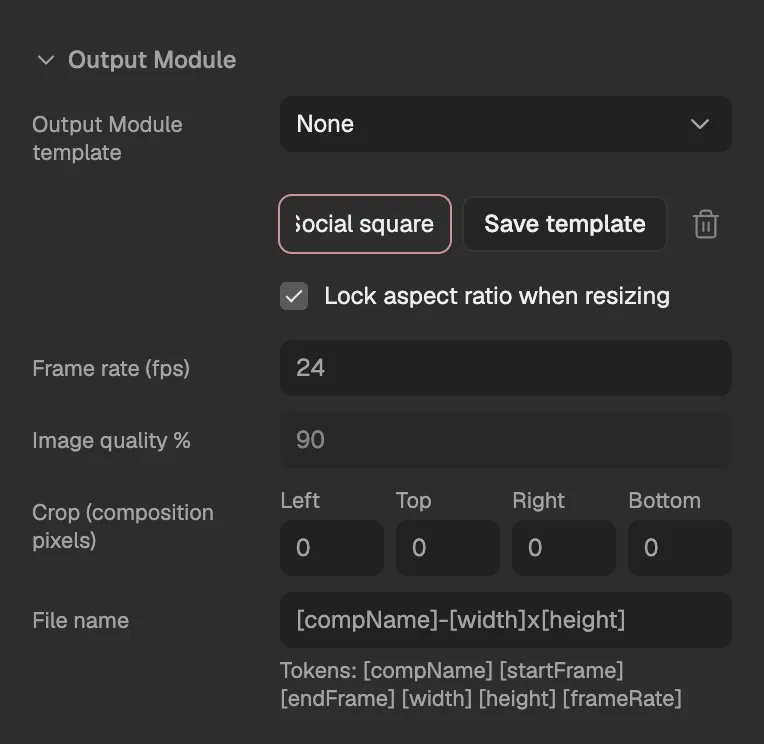
- Opens the Output Module.
- Fills the dialog from a saved template.
- Saves the current settings under the name beside the menu.
- The file’s frame rate.
- Pixels trimmed off each side.
- The file’s name, from tokens.
Templates are kept in this browser and offered in every project in it. An export keeps its own copy of the settings, so changing or deleting a template never changes an item already in the queue.
Faster exports on several cores
For longer exports, Keyframe renders several frames at once on background threads, as many as your computer’s processor cores allow. It decides by itself: it times one frame first, and uses them only when that will be quicker. There is nothing to set.
The result is the same either way: rendering in parallel gives exactly the pixels that rendering one frame at a time does.